|
AD&D Tower of Mystery
Advanced Dungeons and Dragons Tower of Mystery (which will
henceforth be shortened to Tower of Mystery for the remainder of
this review) was the third game Mattel developed based on the
Dungeons and Dragons license (hence the WIP name D&D
III). The first AD&D game was Cloudy Mountain
(originally simply called AD&D), this was followed by
Treasure of Tarmin, and eventually Tower of Mystery (originally
called Revenge of the Master). While all of these games
made it to the Intellivision, the Atari 2600 wasn't so
lucky. Neither Atari 2600 Tower of Mystery or Atari 2600
Treasure of Tarmin made it out the doors before Mattel closed
down. Interestingly when the Intellvision version of Tower
of Mystery was finally finished and released during the INTV
years it was renamed Tower of Doom in order to avoid paying for
the AD&D license. It is believed that INTV may have
also been considering finishing up the Atari 2600 version in a
similar manner (see the individual prototype pages for more
information). 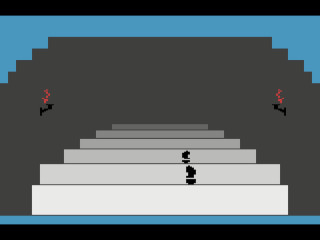
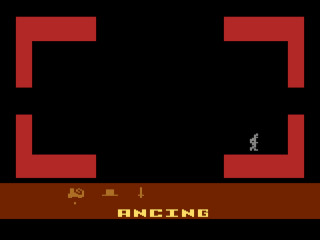
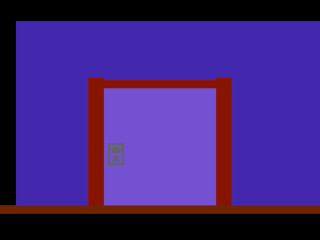
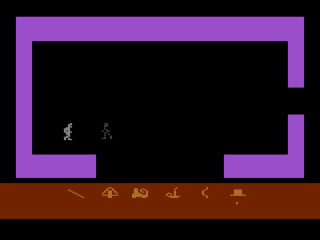
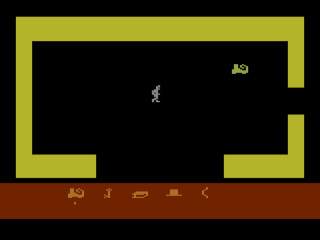
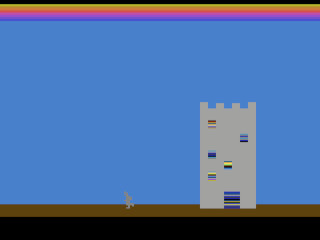
Although they were developed at the same time, the Intellivision and Atari 2600 versions of the game are rather different. This is not only due to the less sophisticated hardware of the 2600 but also because the gameplay of the Intellivision version was still in the process of being defined when programming on the 2600 version was started. Programmer Jane Terjung was a huge Dungeons and Dragons fan and was given free reign to make the game any way she wanted so it deviates from the Intellivision version in several ways. However the games do share many similarities including the map screened used to move around the tower, the inventory system, scrolling text, and the close up battles when fighting monsters. |
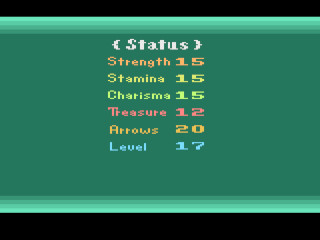
| Strength |
This is supposed to determine the power of your
attacks but is checked so all attacks deal 1 damage |
| Stamina |
The number of hit points you currently have |
| Charisma |
This is supposed to determine how easy/difficult
it is to bribe a monster but is never checked so bribes
always work |
| Treasure |
How many treasures you have found. Treasures
are used for score. |
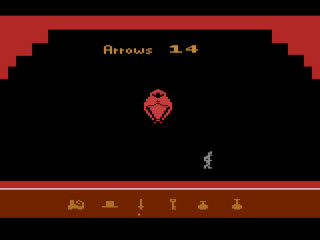
| Arrows |
How many arrows you are carrying |
| Level |
The current level of the tower you are on.
Level one is the starting level at the top of the tower. |
| Weapons | These need to be selected to fire on monsters on the combat screen. |
| Equipable Items | These items need to selected in your inventory to have an effect such as the Hat of Vision or Boots of Speed. |
| Bribe Items | These items don't seem to have a use outside of bribing monsters. Some however will increase one of your stats by 1 to 3 points when picked up. |
| Consumable Items | These items are used
immediately and don't appear in your inventory.
These include arrow pick ups and stat boost items |
| Treasures | These are simply used for scoring and will be
added to your treasure count when grabbed if you have the
Bag of Holding power up. Otherwise they go into your
inventory slots. |
| Power Ups |
These items grant special powers to the player and
last forever or until the player picks up a different item
to replace it. There are six different power ups but
you can only carry four at once. Picking up a fifth
one will replace the oldest power up. You can see
which power ups you have on the status screen but only
when you have the Hat of Vision equipped. |
List of Items
| Item |
Type |
Icon |
Description |
| Boots of Speed |
Equipable |
 |
Makes your character move faster |
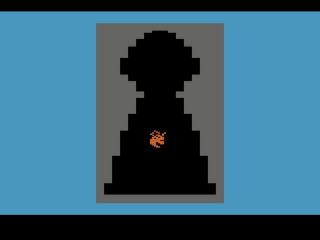
| Hat of Vision |
Equipable |  |
Probably the single most useful item in the
game. The Hat enables you to see traps and invisible
monsters, allows the player to see the special items
they've picked up on the status screen, see through the
keyhole of locked doors, and even open hidden doors.
The reason for this is most likely that the Hat of Vision
was being used as a debug item for testing, allowing the
tester to avoid having to grab all the other items to get
their powers. Fun Fact: The Hat of Vision was originally the Glasses of Seeing |
| Ring of Stealth |
Equipable |  |
Freezes monsters in place but makes the player
invisible so it's hard to move around without running into
walls. Also increases your charisma by 1 to 3
points. |
| Key |
Equipable |  |
Opens doors |
| Special Key |
Equipable |  |
Opens doors and chests. Also can reveal
hidden doors. |
| Wand of Healing (yellow) |
Bribe |
 |
Increases your lowest stat (stamina, charisma, or strength) by 1 to 3 points |
| Wand of Healing (white) | Bribe |
 |
Same name and icon as the yellow Wand of Healing
but white. Doesn't give any stat boosts when picked
up. |
| Candle | Bribe |  |
Unknown |
| Bluish Scroll | Bribe |  |
Increases your stamina by 1 to 3 points |
| Vial of Stuff | Bribe |  |
Increases your stamina by 1 to 3 points |
| Book | Bribe |  |
Unknown |
| Potion of Invisibility | Bribe |  |
Unknown |
| Bow | Weapon |
 |
Allows you to attack monsters |
| Crossbow | Weapon |  |
Allows you to attack monsters |
| Dancing Sword | Weapon |  |
Allows you to attack monsters |
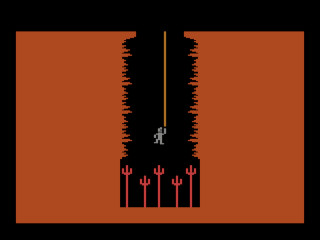
| Rope | Power Up |  |
Saves the player from spiked pit traps, but still
drops you down a level. Disappears when you change
levels. |
| Shield | Power Up |
 |
Unknown |
| Bag |
Power Up |  |
Archives treasures on the status screen instead of putting them into inventory |
| Gauntlet | Power Up |  |
Protects from Teleport Traps |
| Wings? |
Power Up |  |
Unknown |
| Scroll | Power Up |  |
Allows you to view the status screen. Not
needed in Easy Mode. |
| Coins | Treasure |
 |
Treasure item |
| Necklace | Treasure |  |
Treasure item |
| Chalice | Treasure |  |
Treasure item |
| Candelabra | Treasure |  |
Treasure item |
| Gem | Treasure |  |
Treasure item |
| Cup | Consumable |
 |
Increases Stamina |
| Bowl | Consumable |
 |
Increases Stamina |
| Arrow Quiver | Consumable |  |
Adds one arrow to your inventory |
| Chest |
Other |
 |
Requires the Special Key to open. Chests usually contain a random item but sometimes contain monsters or teleport traps. |
| Monster |
Icon |
Description |
| Beholder |  |
Not nearly as deadly as their pen and paper
counterparts. Beholders have 1 HP. |
| Wraith |
 |
A ghostly apparition. Wraiths have 1 HP. |
| Serpent |
 |
Looks like a very large
snake. Serpents have 2 HP. |
| Bat |
 |
A giant bat. Bats have 2 HP. |
| Mummy |
 |
Looks like a skeleton on the dungeon screen.
Normally invisible but can been seen with the Hat of
Vision. Mummies have 3 HP. |
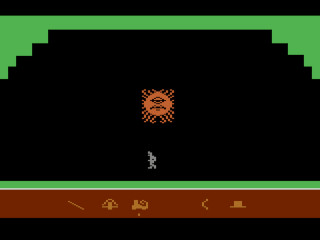
| Aga Aga |

|
The big bad guy of the game. Aga Aga is a
lich who looks like a red wizard on the dungeon screen but
a giant skeleton on the combat screen. Killing Aga
Aga will automatically win the game. He's found
randomly in the tower. Aga Aga cannot be bribed and
will actually taunt you if you try. Aga Aga has 5
HP. Fun Fact: Aga Aga is named after a glitch that occurred during programming where Jane accidentally pointed the wrong area of memory to retrieved the name entered at the beginning of the game. The game then returned the gibberish name 'Aga Aga' which Jane decided to keep for the evil master of the tower. |
| The Princess |  |
Not actually a monster, but rather a damsel in distress that is locked away somewhere in the tower. If you find the princess you'll automatically exit the tower and win the game. |
| Trap
Type |
Description |
| Pit Trap |
Drops your down to the next level and you lose 1
Strength point |
| Spike Pit Trap |
Kills you instantly unless you have a rope.
If you have the rope you will still drop down to the next
level. |
| Teleport Trap | Teleports you to a random room and you lose 1 Strength point. Unlike the other traps the Teleport Trap never disappears. You will need to find the Gauntlet power up to get past these or avoid them. |
Color/B&W Switch
The Color/B&W switch turns the Debug Mode on and off.
Color - Debug Mode. In this mode you start the game
with a Hat of Vision and Boots of Speed but the game will end
after only three levels (on level 4). You can also see
your status screen without the scroll. The Princess will
always found on level 2 and Aga Aga on level 3.
B&W - Normal game. You start with no items and
the number of floors is determined by the Left Difficulty
switch.
Left Difficulty Switch
* All the weapons seem to be the same.
* Monsters can be bribed 100%
of the time
* Stats other aren't checked and therefore don't do anything yet. However if any of them reach zero you will die.
* There is a duplicate Wand of
Healing that is supposed to be another item.
There are also a number of bugs still in the game.
* At the start of the game sometimes you are shown falling down a pit instead of walking down the stairs.
* Sometimes the game doesn't end when it should it will continue to generate new tower levels. The Level counter rolls over at 100.
* Occasionally graphical glitches such as tin black lines can be see in the walls.
* The map will sometimes fail to blink the room you're currently in.
* It's
possible to get into a monster encounter without arrows or items
to bribe with so you cannot escape and must restart.
* If you keep shooting a monster after it surrenders it will turn hostile again and cannot be made to surrender again so you cannot leave the screen. You can still however bribe the monster so it will allow you to leave.
| Version | Cart Text | Description |
| 1/16/84 | DD III 1/16/83 |
80% Complete |
| 6/12/86 | DD III 6/12/86 | 80% Complete |